An artwork is not complete until it is varnished. For acrylic work you can apply a layer of varnish 1 to 2 weeks after finshing the painting depending on how thickly you have applied the paint.
For oil painting however you should wait approximately 3 months before varnishing. This may seem excessive but I have even given some artworks 12 months to dry.
While seemingly dry to the touch oil paint will continue to contract for some time dependant again on thickness of paint but also on the amount of medium (linseed oil etc) used. Varnish dries almost immediately so if your painting is still contracting the varnish will crack in a fashion similar to what is termed 'crazing' in pottery.
Another reason to wait is that varnish can act as a mild solvent and will cause colours to run if they are not completely dry. Given the time and effort you have put into your work it would be a tragedy to ruin it at this point.
My personal choice for a varnish is a satin finish but it is also available in matte and gloss. I find that gloss puts too much of a shine on the surface and matte so little that I am sometimes unsure if I have varnished the painting at all.
Begin by using a wide flat brush and a clean container. Ensure that all dust is removed from the surface of the work by wiping it with a soft clean dry cloth. Work quickly by applying brush strokes in one direction only from top to bottom. Keep the strokes even and do not over apply varnish as a thin layer is better than a thick one.
By brushing in one direction you ensure that all future light hitting the painting will reflect from the surface evenly and at the same angle whereas haphazard strokes will cause light to play differently and cause reflective patches that are detrimental to the viewing experience.
Keep an eye out for loose bristles, fibres, etc and remove them immediately with a small clean brush. Once finished leave the painting to stand for a couple of hours to dry in an undisturbed room.
Tip: Angel your easel toward the light so you can easily see the shine of varnish on the surface as you apply it. This will aid in avoiding missing any sections or edges.
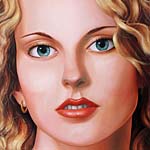
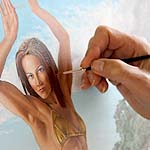
PORTRAIT PAINTING A Step by Step Guide Using the Layering Technique
NZ $4.99
Product details: epub
29mb
Adult Reading
Available from: Peterpumpkin Store
A step by step guide that covers the development of a portrait painting in oils using the layering technique by artist A D Sutton. This portrait painting of Deborah Harry, lead singer of 80s rock band Blondie, has been photographed at each step of the process along with a descriptive text that details how, when and why each layer is applied.